Create Your Dream: Mastering Premium Design Assets Without the Headaches
You found the perfect design. It captures the exact aesthetic for your brand, your next product launch, or a custom gift. You purchase it, download it, and then… reality hits. The colors look strange. The resolution seems wrong. The software won’t open the file. Suddenly, your “Create Your Dream” project feels more like a frustrating puzzle. The issue isn’t the design itself—it’s the gap between receiving a professional asset and knowing how to wield it. Whether you are a seasoned small business owner or a beginner diving into print-on-demand (POD), understanding the structure of your design pack is the key to unlocking its full potential.
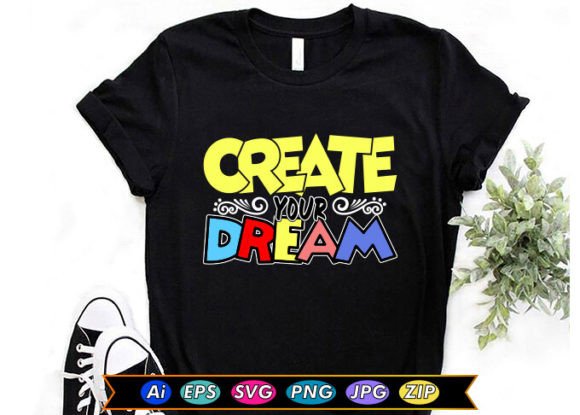
A quality design asset like Create Your Dream is more than just a nice image. It is a toolkit. This particular resource typically arrives as a suite of files including AI, SVG, EPS, JPG, and a transparent PNG. These are not just redundant copies of the same picture; each format serves a specific purpose. The high-resolution JPG and PNG (optimized at 4500x5400 pixels and 300 DPI) are perfect for quick applications, while the vector files (AI, SVG, EPS) exist for one reason: infinite scalability and deep editing. Ignoring the difference between these formats is the first and most expensive mistake most people make.
Mistake 1: Treating Vectors Like Useless “Extra” Files
The most common oversight we see is treating a design pack like a simple JPG. You download the folder, find the pretty picture, and ignore the AI or SVG files because you don’t instantly know how to open them. This is understandable, but it severely limits your results. That beautiful 4500x5400 pixel PNG is impressive, but at 300 DPI, it maxes out at a crisp print size of around 15 inches by 18 inches. This is fantastic for a standard t-shirt, a coffee mug, or a laptop skin. But what happens when you want a large wall decal, a promotional banner, or a sign for your storefront? The raster file will pixelate and look unprofessional.
The practical correction: Learn to love the vectors. The AI, SVG, and EPS files are mathematically defined, meaning they can scale to the size of a billboard without losing a single ounce of quality. If you own Adobe Illustrator, the AI file is your best friend. If not, free tools like Inkscape (which handles SVG beautifully) or Gravit Designer can open and manipulate these files. Take the extra ten minutes to learn the basics. For example, let’s say you run a small bakery and want a large window decal. Opening the SVG file allows you to export a print-ready PDF at exactly 36 inches wide. Using the JPG for that same task would result in a blurry, unprofessional mess that reflects poorly on your business.
Mistake 2: The ZIP Folder Confusion and Resolution Roulette
You receive the files compressed in a single ZIP folder. A common stumbling block, especially for beginners, is trying to work directly from the compressed folder. Design software often cannot properly read files inside a ZIP, leading to corrupt-looking images or error messages. Another frequent oversight is resolution management. The provided JPG and PNG are built at 300 DPI, which is the industry standard for printing. However, if you quickly open the file in a basic viewer or drag it into a design app without checking the settings, you might inadvertently export or print it at 72 DPI (the standard for web screens). The result is a blurry, jagged edge on a project you spent money to produce.
The practical correction: Before you do anything else, right-click that ZIP folder and choose “Extract All.” Place the contents into a dedicated folder labeled with your project name. This preserves the file integrity and organization. When you import the JPG or PNG into tools like Canva, Photoshop, or your POD uploader (like Printful or Redbubble), verify the DPI settings. If you need a larger print, do not stretch the raster file—go back to the SVG or EPS to export a clean, large-scale version. Understanding this simple workflow separates a confident creator from someone constantly fixing errors.
Mistake 3: Overlooking the Editing Potential
Perhaps the biggest missed opportunity with a resource like Create Your Dream is not personalizing it. Many users simply drop the design onto a shirt or a bag and call it a day. While the design is undoubtedly striking on its own, you are paying for editable files. Using the design exactly as-is without customization tells your customers that you didn’t put in the extra effort. In a crowded market, generic products blend into the background.
The practical correction: Open the AI or EPS file and make the design your own. Change the color palette to match your brand guidelines. Add your company name. Remove elements that don’t fit your aesthetic. For instance, if you are a fitness coach creating a line of motivational apparel, you could open the SVG file in a free editor and swap the background color from blue to your signature neon green. You can combine it with your own logo mark. This transforms a generic asset into a signature product that builds brand recognition. The editable files are not just for convenience; they are your launching pad for creativity.
Mistake 4: Application Mishaps in Production
Using the design on physical products—shirts, cups, bags, decals, or stickers—introduces a whole new set of technical pitfalls. One of the most heartbreaking errors is failing to mirror (flip horizontally) heat transfer vinyl (HTV). You cut the design, press it onto a t-shirt, and peel back the carrier sheet to find the text is backward. The culprit is often using the wrong file type for the wrong application.
The practical correction: Match the format to the method. When using HTV or sublimation, rely on the vector files (AI or SVG) for clean cuts and color separations. For Print-on-Demand (POD) services, the transparent PNG is your secret weapon. Loading the JPG onto a dark-colored shirt will often result in a white box around your design. The transparent PNG (provided at 4500x5400 resolution) eliminates that border, allowing your design to sit cleanly on the fabric. If you are screen printing, use the EPS file in your separation software to isolate the colors. Taking a moment to identify your end medium and choosing the correct file saves hours of frustration and wasted materials.
Mistake 5: Assuming All Commercial Use Is Unlimited
This is the detail that gets entrepreneurs and small business owners into legal hot water. The excitement of a beautiful design often leads to ignoring the license agreement. While most premium packs like Create Your Dream allow commercial use—meaning you can sell products featuring the design on your Etsy store or at a market—there are almost always restrictions. The most common one is that you cannot resell the digital files themselves. You also typically cannot upload the asset to a print-on-demand site if that site requires you to transfer the license to the manufacturer or if the site has a public library that would expose the raw file.
The practical correction: Read the license. If you are a freelancer creating graphics for clients, you need to understand whether the license is transferable. If you a running a Merch by Amazon account, check if the asset is exclusive or if others can use it. A good rule of thumb is to treat the design as raw talent—you can use it to build your business, but you must add value and transform it. Don’t just upload the file as-is to a public SVG marketplace. Respecting the license ensures that your business is built on a solid, ethical foundation and avoids costly take-down notices later.
Before You Click “Buy” or “Design”: A Quick Sanity Check
How do you avoid these mistakes before spending a dime or cutting your first shirt? Run through this mental checklist.
- Check your software stack. Do you have a way to open the AI, EPS, or SVG files, or do you need to budget for a free tool like Inkscape?
- Know your output. Are you printing small and need quick JPGs, or scaling large and need vectors? The Create Your Dream pack covers both bases, but you need to know which one to reach for.
- Understand the specs. The 4500x5400 resolution at 300 DPI tells you exactly how large you can print the raster file. Plan your product dimensions accordingly.
- Verify your license. Confirm the number of uses, the transferability, and the platform restrictions before you upload the design to a marketplace.
A resource like Create Your Dream is an incredible shortcut to professional-looking results. It grants you a level of polish that would take hours to build from scratch. But like any tool, its value is unlocked entirely by the skill of the user. By respecting the file formats, understanding the power of vectors versus rasters, personalizing the graphics, and applying the correct production techniques, you can avoid the common headaches that plague so many creators. Don’t just download the files—master them. That is the difference between owning a design and truly making your vision come to life.